
Git worktree - guide to flexible folder structure

As always, let's start with a story why I have written this one down. I have been using git for almost 5 years now and in one of my work places I had to work on the same project but different features in parallel. 

Switching between branches back and forth was a costly operation given that I didn't discover commit amend until recently. Even though I'd have discovered commit amend, I'd still have did this.

Still did what?

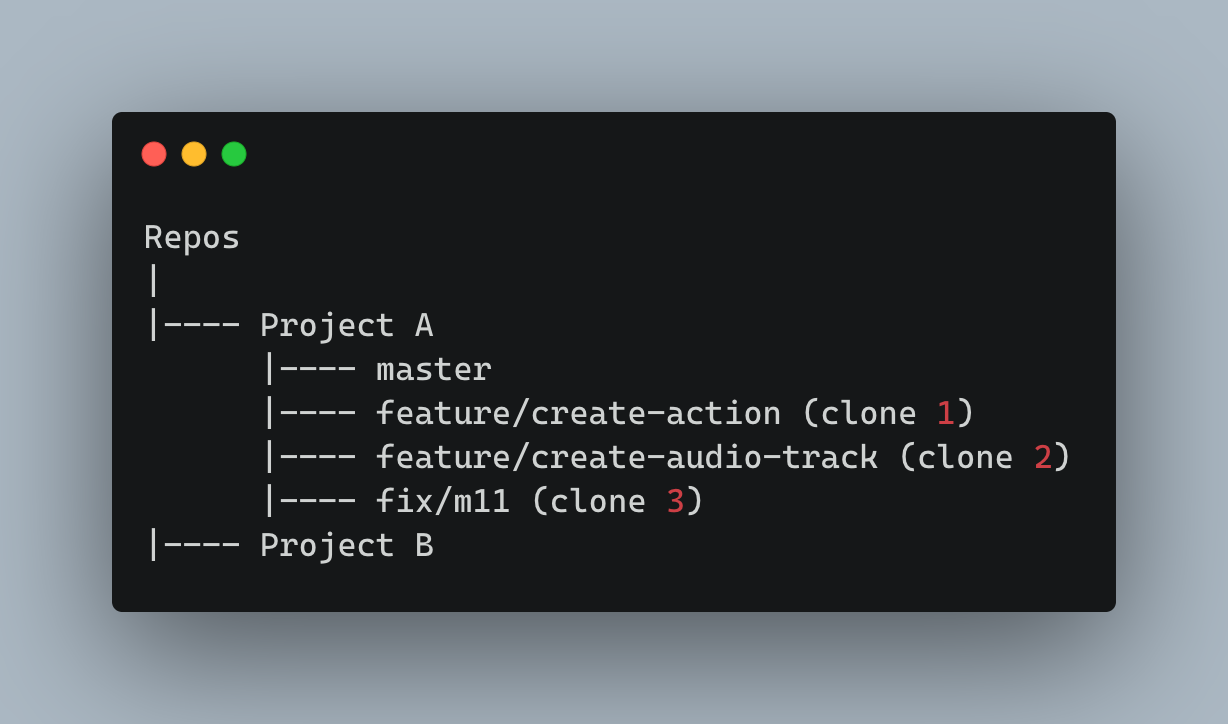
I can sense that question deep from your throats. So, whenever I am in a situation to work on multiple features or a feature and a bug fix, I'd have two clones of my repo each with different branches,

Whenever a feature is merged or the fixes are merged, I'll delete the clone in my machine and branch in my origin (Gitlab / Github etc.,)

Recently when I started writing these git articles, my manager suggested me to learn about Git Worktree and it'll be useful. And when I got free and good understanding of git commit, rebase and stuff, I decided to explore worktree and to my surprise, Git can bring in the above kind of folder structure using worktree.

Pre-requisites

  1. Clone your repository
  2. Create a new branch either in remote or local
  3. Once done, we are ready to get started with worktree.

Getting started

Creating a worktree

So, you have a branch created and now you need that branch to be checked out but in a different folder. This is when you create a worktree like below command, 

Assuming you are already in the following folder structure and inside the directory "master",

Let's try and create a work tree with the following command,


/**
 * 
@disclaimer
 * The commit hash and messages used are not real and wrote for demo purposes
*/

Now, a new folder gets created under ProjectA with name "create-action" and when you navigate into that folder, you'll see that the branch that is checked out there is feature/create-action and the folder structure will look like,

What are the benefits?

  1. Quickest & easiest command to create a new folder and clone a different branch.
  2. Uses less memory compared to the former way of cloning each branch. This is because, all these worktrees use the same ".git" folder which holds remote and local git configurations. 
  3. Once again, quick command to remove the folder once done.

Caution - If you want to backup a worktree

As it uses the same .git folder, after creating a work tree, if you copy that folder as a backup, git changes made in the original folder will affect the copied backup folder as well. If you check the file type of master/.git it would be directory and it would be so for any cloned repo folder.

However for worktree, it's just like a symlink. If you check the file type for create-action/.git here, it will be an ASCII text file with the content as below,

gitdir: ~/Repos/Project A/master/.git/worktrees/feature/create-action

Therefore, if you are backing up a worktree folder, ensure you remove the .git file inside the copy. This way, the changes made in the original directory wouldn't affect the copied backup.

Listing all the worktrees

Now, while the command is simple, you will just have to be in the folder that has .git directory. In this case, the master branch folder.

This will list all the worktrees created. 

Removing a worktree

We shall remove a worktree folder by simply deleting the folder. However the information file that will be available in ~/Repos/Project A/master/.git/worktrees will continue to exist. 

To avoid this, git has introduced the remove command like below,

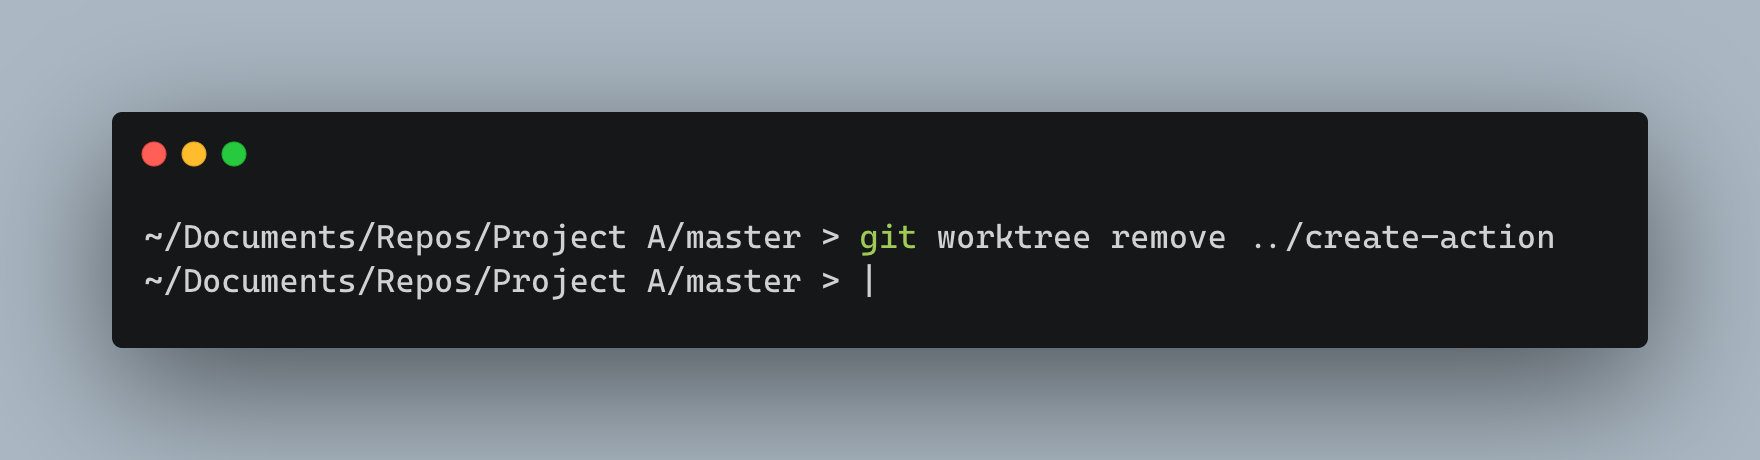
This will remove the folder in .git/worktrees as well as in the Repos/Project A

This documentation about worktree from git explains a lot more in detail but above are the basics with which a developer can lead a more peaceful folder structure.

Have a good time re-structuring your local repo with worktrees if not already 💪

Comments

Popular posts from this blog

WebRTC - What the heck?

Over the past few weeks, I happened to work on stuff that enabled me to understand what WebRTC is and how useful it is.  The full form? Web R eal- T ime C ommunication The history It's first release was by 2011. If you want to know more, well, please read the wikipedia . WebRTC  has been a boon to web developers who want to build streaming applications or video calling applications. As you move downward, you'll just may be understand how WebRTC works but nothing technicals.  The story Let's begin with a short story. Long long ago, so long ago, nobody knew how long ago, there lived two shop keeper farmers John & Finch. It was that old point in time when barter system was a thing and money wasn't invented.  These shopkeepers lived in different cities across a river and the cities were connected by a rock solid bridge. Like how the golden gate connects the San Francisco city and the Marin County. Finch is a very private person and takes hard time to trust people. John

Git - How to drop a commit in history?

Back after a while with another git magic. We already have seen how to get rid of the top most commit in this article ->  Git magic - Make commits disappear First of all, it's one of the not so recommended way of doing it and more than that, it can only get rid of sequential commits from latest. I recently happened to get into a scenario where I had to drop a commit in the history by keeping the latest ones. As part of that exploration, presenting you this article. /**  *  @disclaimer  * Please read this post fully before executing any command. My scenario might not be same as yours. */ To my greatest surprise, I didn't know a git rebase could do this. Please continue to read to know how. The steps are simple, Count until the commit line you need to drop using git log Do an interactive rebase and you're done.  Let me explain step by step. 1. Look at the commit log & count commits This is the first step. First let's list the commits using the following command,  

TDD - How to go about it? - A quick start example

So, it's only recently I've been doing TDD. I have written unit tests before but those were all tests after writing the actual code. Confusing statement right? /**  * @disclaimer  * I'm just preaching what I practice and some parts of it could be wrong.  * Please feel free to leave comments if am wrong  * And I would be happy to stand corrected */ What is TDD? TDD, expanded as Test Driven Development could have this statement as one of the definitions. "TDD is nothing but the art of writing down the business use case one by one and write code based on it paralelly" It would feel like why do I need to write test for that? We could do the same with pen & paper and write codes. But then, you again circle back to write tests for the same. So why not do it this way?  Therefore, let's start with an example, Write a method that accepts two positive numbers as input and returns their sum Let's try and do a mock TDD for the above problem.  Case 1 - Function add